

New Releases: Appointment Service Categories & Workout Tracks 💪
You can now organize your appointment services into categories to make the booking process easier for clients, plus restrict which customers see specific workouts based on tag using workout tracks!

Appointment Service Categories
A new way to organize your appointment services (for your staff and your customers) just dropped…introducing appointment service categories!
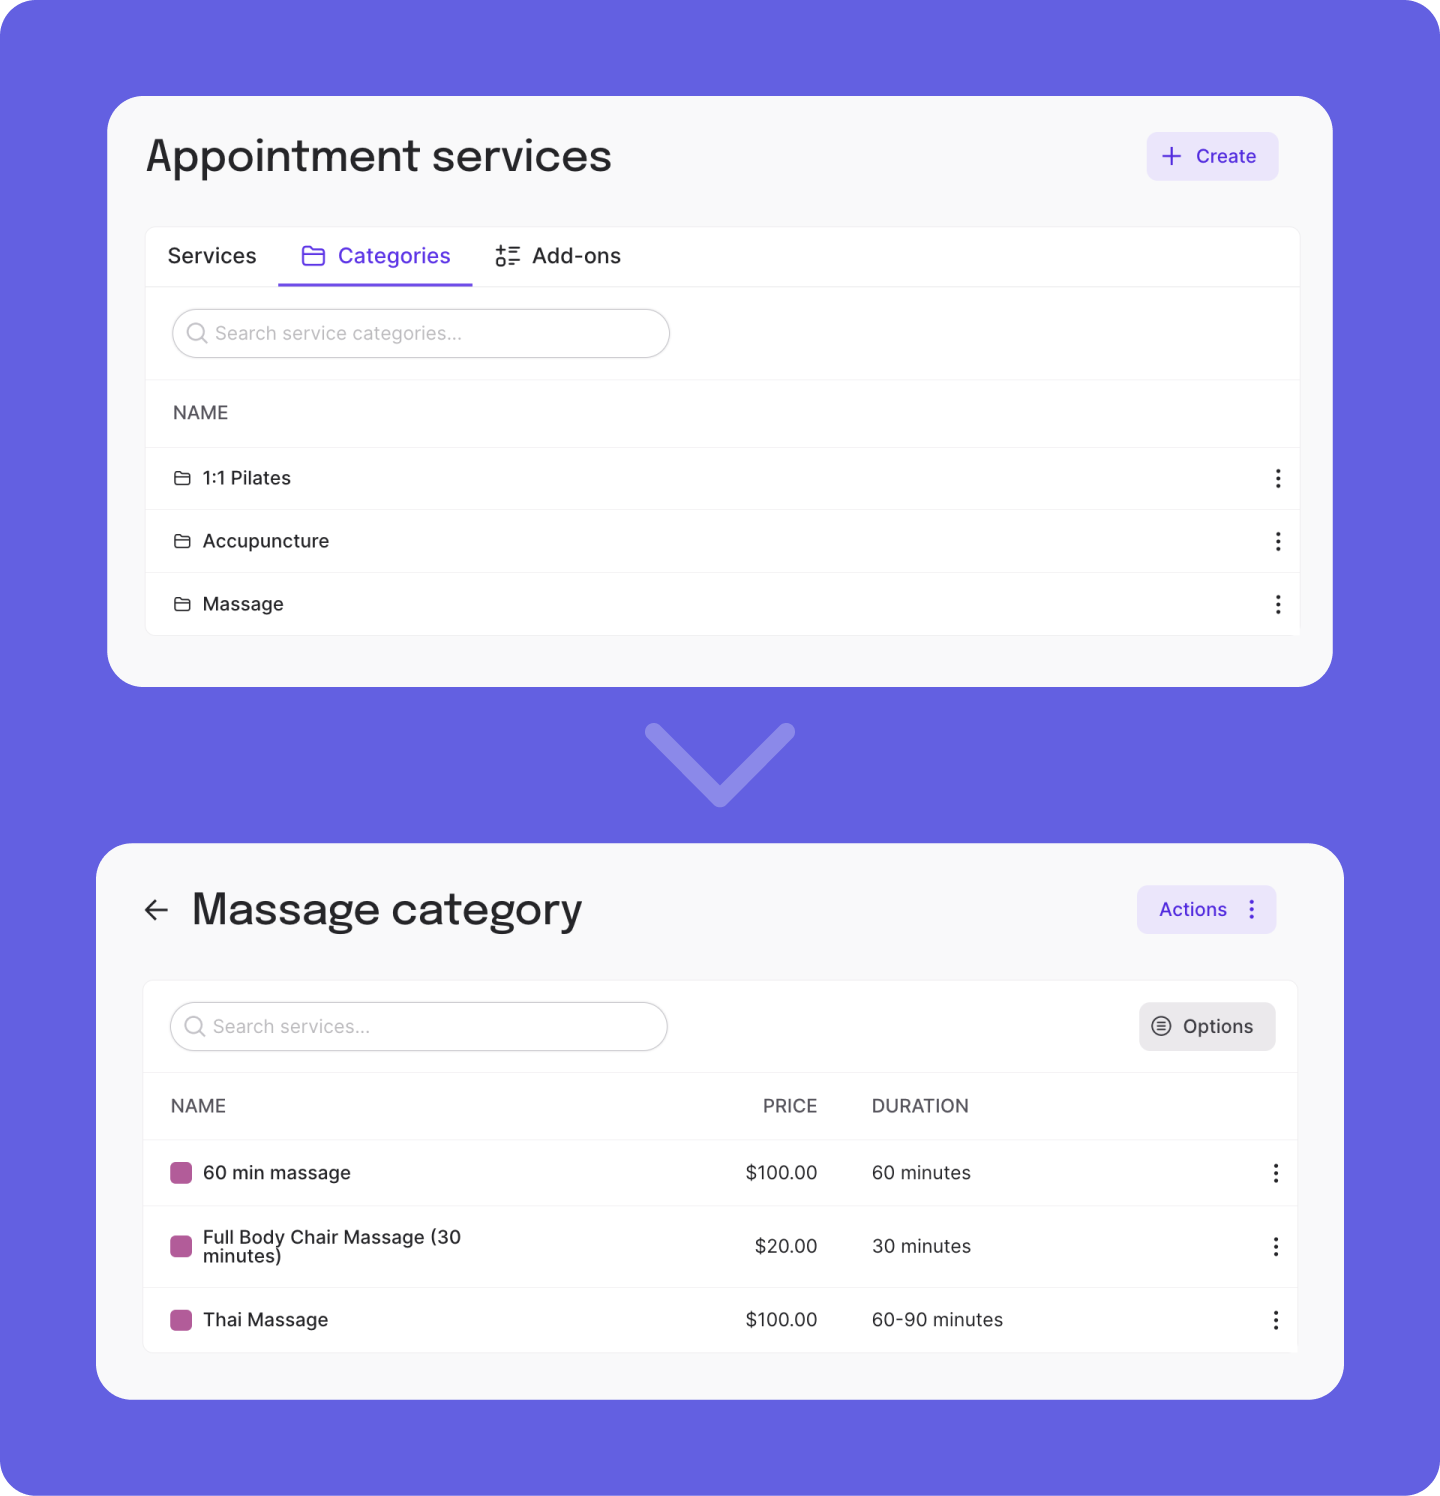
This new feature is especially helpful when you have different umbrellas of service types, with multiple variations of those services that fall under them. For example, let’s say you offer 1:1 pilates appointments, acupuncture and massages. When you organize your services into categories, it allows your customers to first select the category they’re looking for so they only see the services relevant to them (i.e. someone looking for private pilates doesn’t need to see the massage services) versus seeing your entire list of services jumbled together. This makes the booking process much easier, leading to less confusion and clients reaching out to be booked in manually.

To get started with Appointment Service Categories, first go to Appointments > Services > Categories and create the categories that you want.

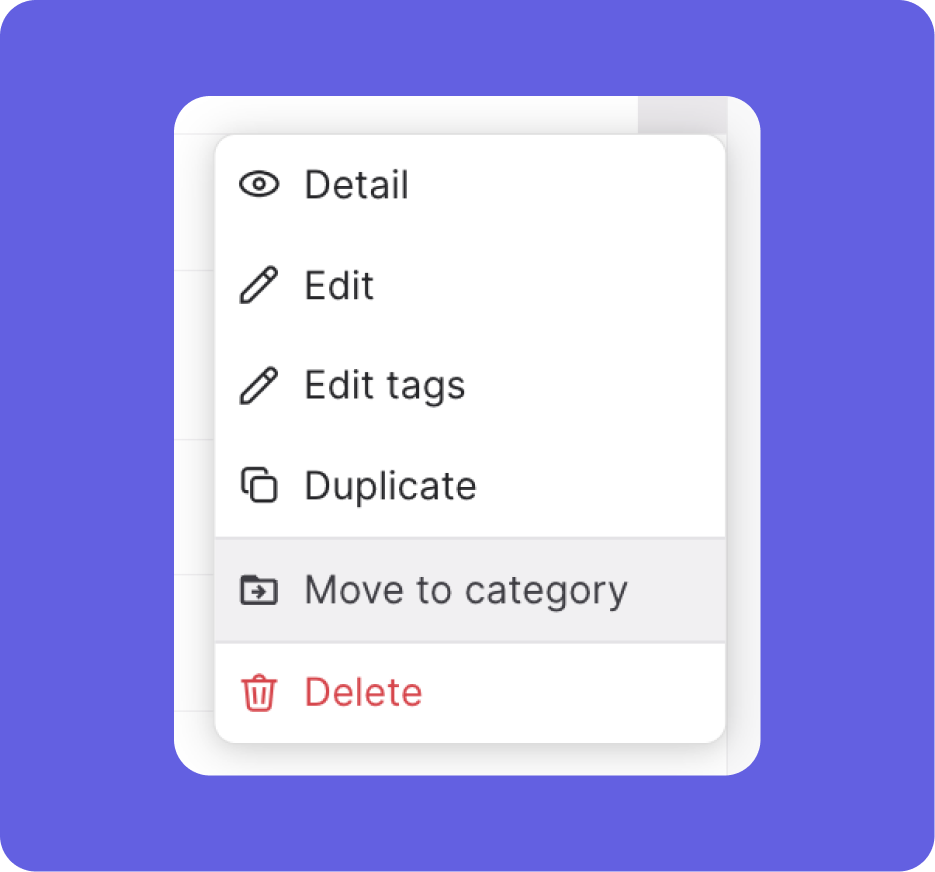
Then, from the Services section, you can assign any of your services to the correct category by clicking the three dots next to the service and selecting Move to category.
Workout Tracks
We are psyched to announce our newest development in our Workouts app - Workout Tracks. With this new feature, you have the ability to limit which clients can view certain workouts based on customer tag.
For example, let’s say that each day you provide beginner and advanced workouts for your customers. The beginner workouts provide more instruction and less intensity to ensure that those who are new to exercising don’t get injured, while the advanced ones are for folks who have been working out with you for a while and are ready to be pushed to the next level.
To organize this, maybe you want to give anyone who’s had between 1-15 visits the beginners track, and anyone with 16+ visits gets access to advanced. You could use Sequences to manually tag every new customer as beginner, and have that tag removed and advanced added once they have their 16th visit (more on how to add tags using sequences here and here). Note that you can always adjust someone’s tag manually as well if needed. Then, you can create Tracks based on these tags, and label each workout accordingly…here’s how:
After creating your tag(s), navigate to Workouts > Tracks > New Track and create the name and details of that track.

Then toggle ON Restrict to customers with specific tags and select the appropriate tag(s) that will have access to this track.

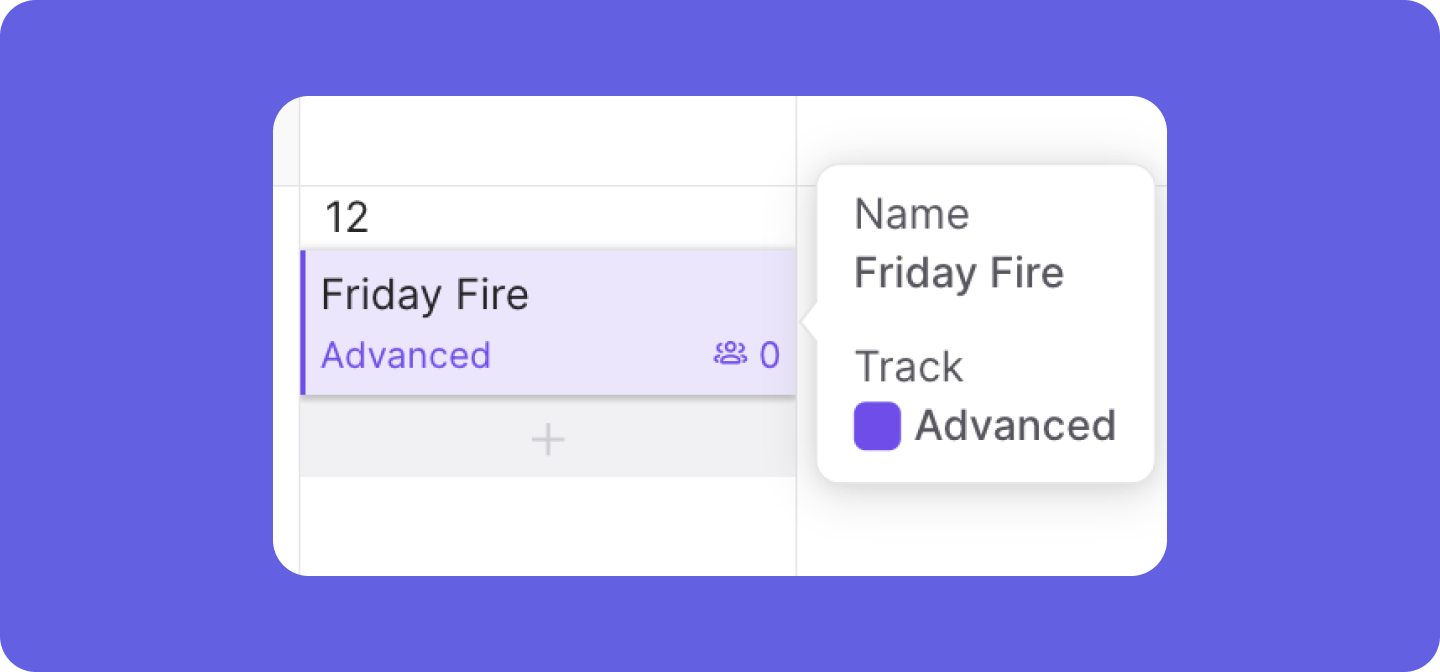
Next, head to Workouts > Programming. Now, when you go to schedule a workout, you will have the option to choose which Track is associated. If you already have your workouts on the schedule, you can edit them to add in the correct track.

You will be able to easily see which track a workout is associated with by hovering over the workout on your programming calendar.


Workout Tracks could be used in a variety of other creative ways as well. For example, let’s say you are running a spring challenge that includes specific daily workouts, you could tag anyone signed up for the challenge and create it as it’s own track!
P.S. need a refresher on how to create and schedule a workout? Check out this article.
Want to learn more about this and other great Momence features? Check out our FAQ page or book a demo today.
Already a Momence user and want to know more?
💜,
The Momence Team